Integrating BCome extension in your SPA website
BCome has created a unique script that works for Single Page Application (SPA) platforms. This guide will help to install BCome UI extension.
How to start?
Share and send your SPA website URL with your BCome Account Manager. They will use this to configure your account and enable the extension for your SPA website domain.
How to place the script
Step 01 | Add the SPA script and its event
- In your SPA website, add the script in the desired location on the product page.
- The event needs to be dispatched every time that the product page is updated. BCome’s script will be executed once the event has been dispatched.
Script:
<script type="text/javascript" async src="https://ecommerce-spa.www.bcome.biz/index.js">
</script>
Event:
const event = new CustomEvent("update-bcome-script", {
  detail: { sku: "XXXXXXXXXXXXX" },
});
window.dispatchEvent(event);
Step 02 | CSS Selector
Configure the extension in app.www.bcome.biz
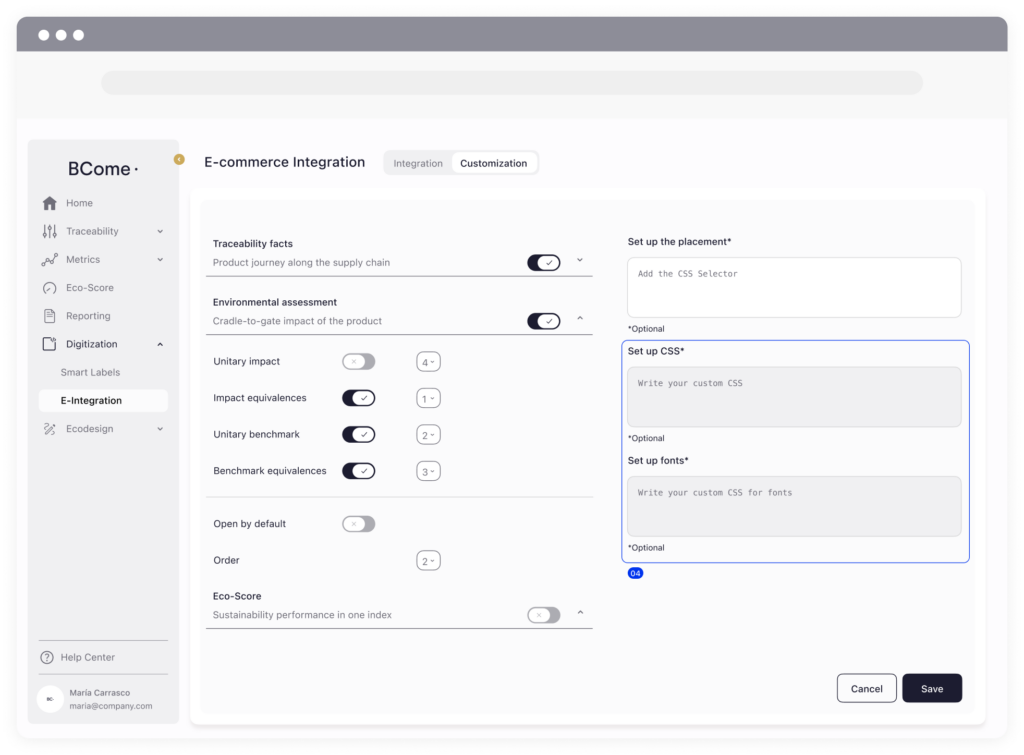
To configure the extension go to Digitalization → E-integration and open the Customization tab.
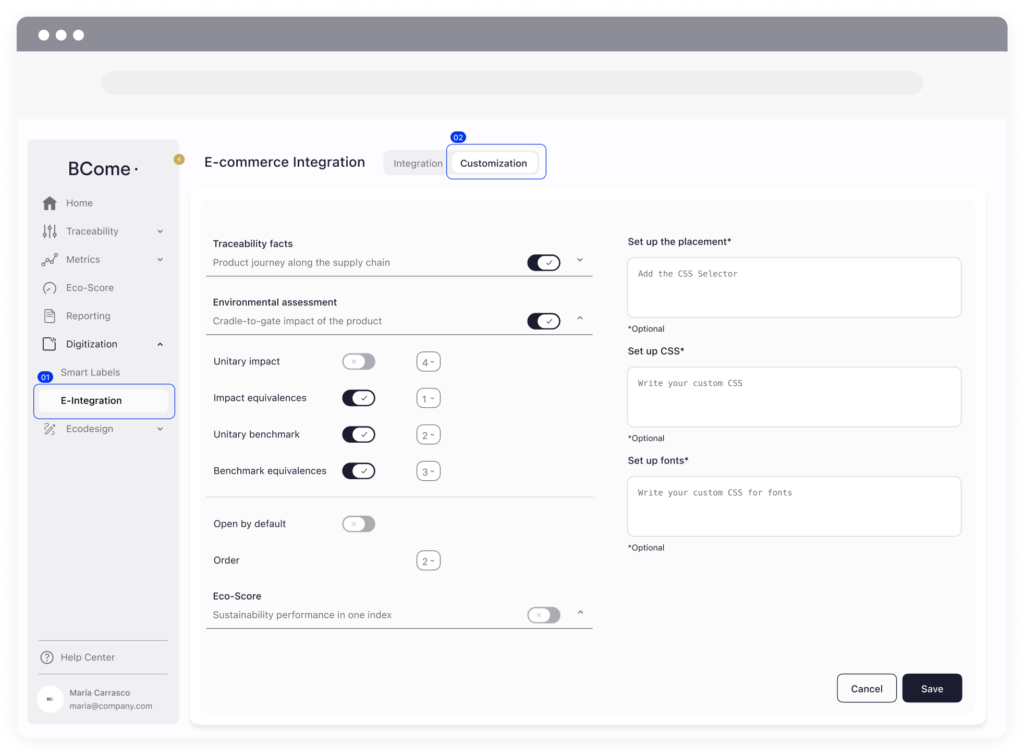
Configure where the extension is going to be placed
📖 Knowledge: If you are unfamiliar with CSS selectors you should ask for assistance from your technical e-commerce team (anyone with HTML and CSS skills), or learn more here.
Find the CSS selector that corresponds to the section of the product page where you would like the extension UI to be placed. You can do that by inspecting the source code of the page.
Step 03 | Configure the modules
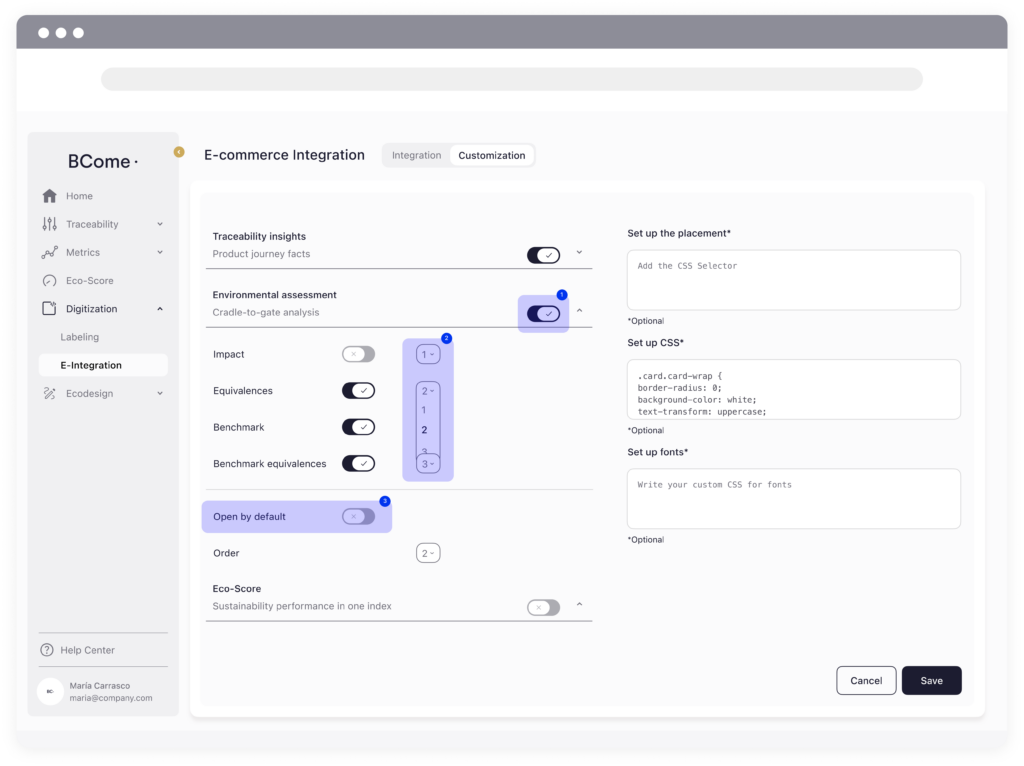
📖 Knowledge: From this panel you can configure your modules that you want to show in your widget. You will only be able to modify those in which your plan is contracted.
- Select through the toggle switch which module to display: the traceability of your products, the environmental part or the ecoscore.
- Only in the Lifecycle Assessment section you can also customize your subsections to choose between equivalences, impact or savings. Sort them through the selector to view them in the order you want.
- Finally, choose whether you want the module to appear automatically open or closed by default. This will help the customer to quickly understand the content inside.
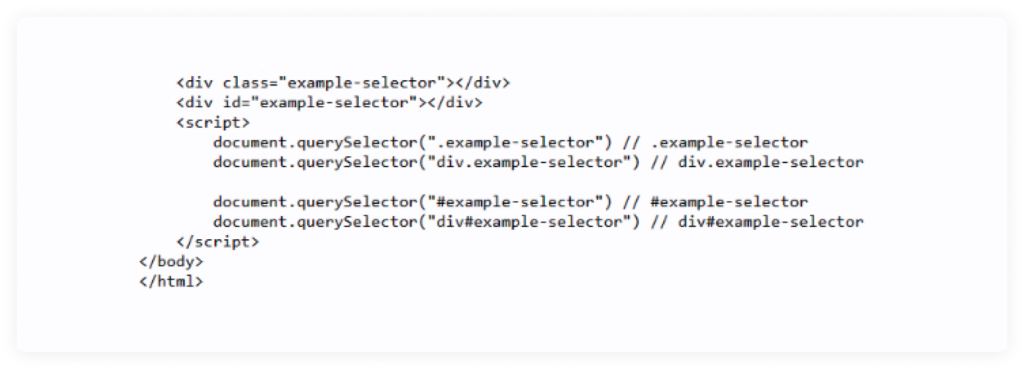
Examples of different CSS types:
- CSS Id
- CSS Class
- CSS Tag + Class or Tag + ID
Once you have the CSS selector, add it to the “Set up the placement” form:
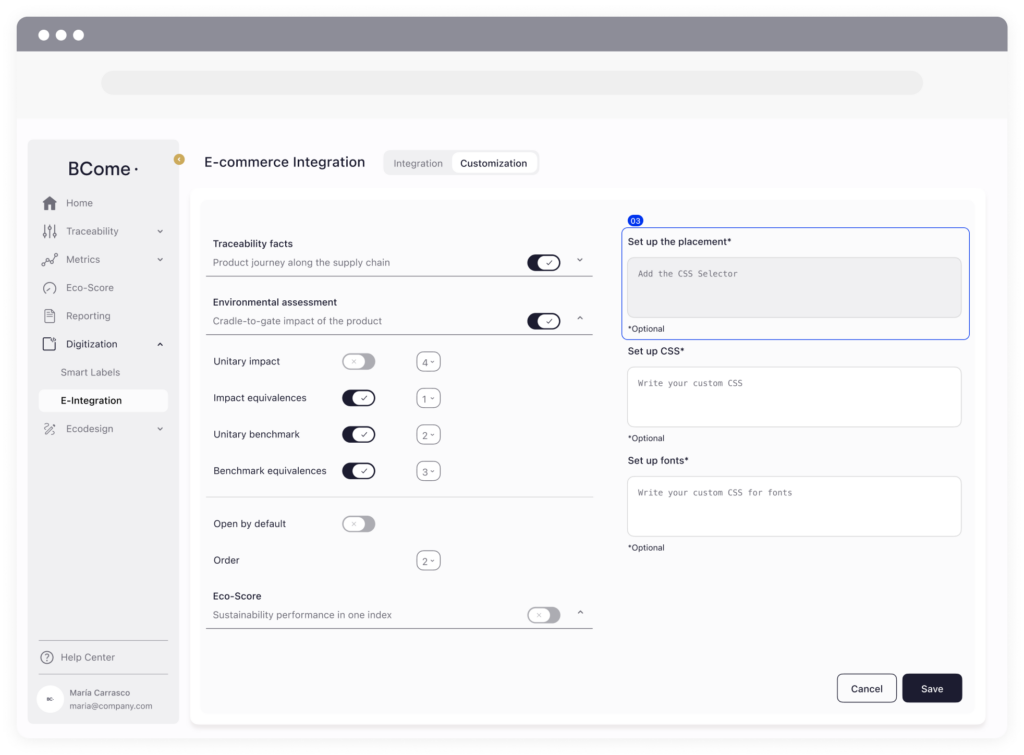
The user interface of the extension will be added as HTML automatically after the selected HTML element.
You can further configure the appearance of the extension UI by adding your own CSS in the right panels and the selection of which sections will be visible in the left panels.
🧑🏻🏫 Shortcuts: Discover the two most common CSS issues and set them up in the Custom CSS section
1. Do you want to eliminate the background color?
To remove the background, we will have to change the color to the color of your web page so that it integrates correctly. In the example, we will see the case that the web is white.
.card.card-wrap {
border-radius: 0;
background-color; white;
box-shadow: none;
}
2. Do you want to change the font color and style?
To change the font color and the style color, we will have to add a style section for the body.
body {
color: #000000;
font-family; SFProText;
}